The Masimo Rad G is an oximeter device used to monitor your child’s oxygen saturation levels and pulse rate. An oxygen saturation probe or oximeter probe is a light and sensor with a band-aid like sticker that is attached to your child’s toe, foot or finger to measure your child’s oxygen saturation and pulse rate levels.
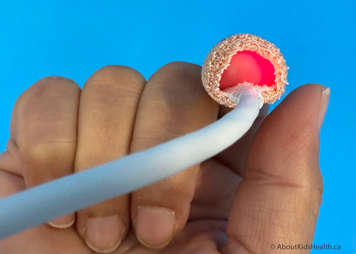
Hemoglobin in your red blood cells carries oxygen throughout the body. The oximeter measures the percentage of oxygen molecules attached to that hemoglobin. When you place the probe on your child, a red light measures the oxygen on the hemoglobin and gives you a percentage. This is why it is important to make sure the light and sensor are aligned to ensure an accurate reading. The best place for the oximeter probe will depend on the age and size of your child.
Watch this video to learn how to set up your Masimo Rad G Oximeter device.
Setting up the Masimo Rad G Oximeter
Please check to ensure you have the following equipment:
- Masimo Rad G Oximeter device
- power cord
- cable
- oximeter probe (disposable or reusable)
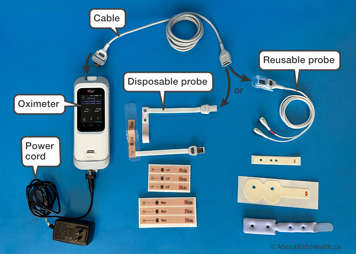
Turning on the device
Plug the Rad G Oximeter device in using the power cord supplied. When fully charged, the internal battery will provide up to 24 hours.
Insert the cable into the top end of the device and secure it in place with the latch.
To turn the device on press and hold the power button for more than two seconds. You will hear an audible tone sound when the device turns on.
Connecting the oximeter probe
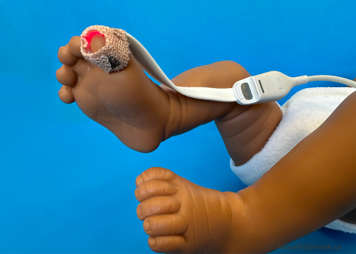
You can use either a disposable or reusable oximeter probe. When placing the probe on your child, the sensor needs to be aligned directly across from the red light when wrapped around your child's finger, toe or foot. The red light should always be placed on the nail or top of the foot and the sensor on the fleshy pad of the finger or toe or on the bottom of the foot.
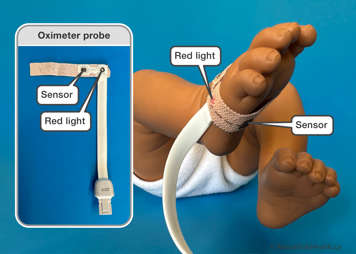
If you are using the oximeter device 24 hours a day, seven days a week, then you need to change the location of the probe daily to avoid irritation or burn from the red light.
Using the Masimo Rad G Oximeter
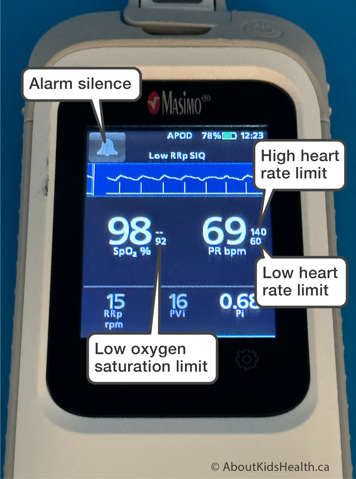
It may take a few seconds for the oxygen saturation (SpO2) and pulse rate (PR) values to be displayed. Check the waveform (displayed above the SpO2 and PR values) to make sure it shows a smooth, consistent pattern. The value on the left side of the screen displays the SpO2 and the right-side value displays the current PR. Alarm limits for each parameter are displayed to the right of the measured value.
The alarm bell icon lights up on the top left side of the screen. The alarm message appears at the top of the screen next to the alarm bell icon. The parameter box that corresponds to the alarm will also illuminate to highlight which parameter is the cause of the alarm. When a parameter box is highlighted in red, this is a high priority, when it is highlighted in yellow, this is medium priority.
When an alarm occurs, always assess your child first and act accordingly. If it is a sensor issue or poor signal issue, once you have assessed your child and they are doing well, then move on to troubleshooting the device.

To find more information about the Masimo Rad-G Oximeter go to the Ventilator Equipment Pool website:
https://ontvep.ca/masimo-rad-g-oximeter/